Create Jupyter Notebook Servers using Vertex AI on GCP
Posted on 28 October, 2024
This is originally posted on Medium in 2024. Link to article.

Introduction
Data science is hot property these days, and for good reason. But getting started can feel overwhelming. We have all been there — Analyzing a large file on our laptop, only to discover the kernel died due to memory issues. Juggling tools, setting up environments — it’s enough to make your head spin. What if there was a way to streamline your data science workflow without sacrificing power or flexibility? Enter Google Cloud Platform’s Vertex AI! In this blog post, we’ll unveil how Vertex AI and Jupyter Notebooks on Google Cloud Platform (GCP) can be your secret weapon for conquering the world of data science, even if you’re a GCP newbie.
Enter Vertex AI
Vertex AI is a unified platform (Previously named AI Platform and AutoML) aims to empower developers and data scientists of all experience levels to seamlessly navigate the entire machine learning lifecycle.
In the GCP ecosystem, it serves as an one-stop solution for catering every need you will have during developing machine learning applications.
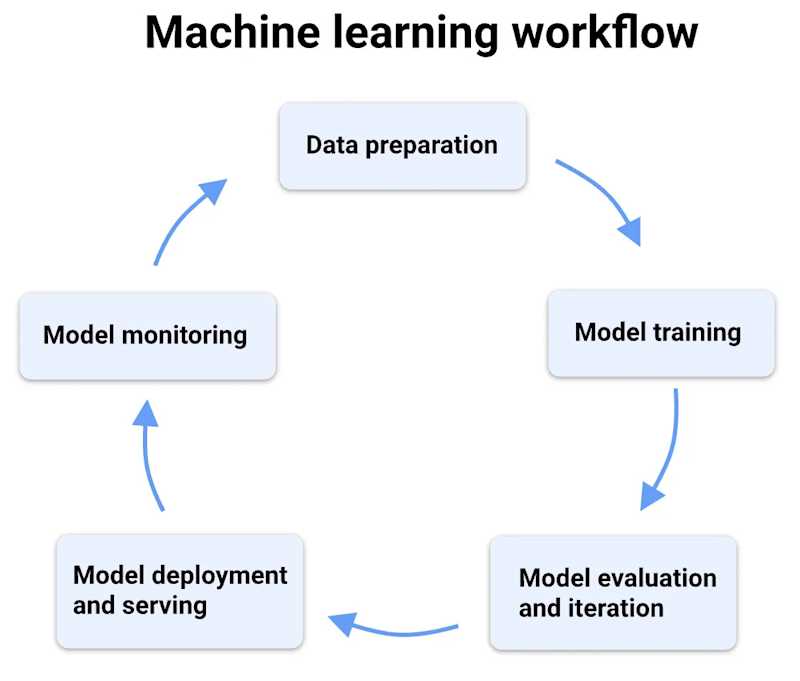
A typical ML workflow, from https://cloud.google.com/vertex-ai/docs/start/introduction-unified-platform
It is helpful to view Vertex AI as a collection of tools (a toolbox, if you will) for DS workloads. In Vertex AI, we have a wide array of tools available (not exhaustive):
Vertex AI Workbench: A cloud-based Jupyter notebook environment for data science and model development.
AutoML: Automated machine learning tools for various tasks like image classification, text sentiment analysis, and tabular prediction.
Custom Training: Tools and infrastructure for building and training custom machine learning models.
Vertex AI Experiments: Manage and track different training runs and experiment configurations.
Vertex AI Model Registry: Centrally store, manage, and track different versions of your trained models.
Vertex AI Explainable AI (XAI): Tools to understand how your models make predictions and identify potential biases.
Vertex AI Serving: Deploy models for real-time predictions or batch inference.
Vertex AI Feature Store: Manage and serve features for machine learning models in a centralized repository (for tabular data).
Vertex AI Viz: Simplify data exploration and visualization tasks.
Vertex AI Search: Build and deploy enterprise-ready search applications powered by generative AI. (Technically not part of core Vertex AI, but leverages similar Vertex AI principles)
Vertex AI Monitoring: Monitor the performance of deployed models in production. (Might be integrated into core Vertex AI services in the future based on documentation updates)
The Vertex AI Workbench will be our focus for this blog post.
Vertex AI Workbench
Vertex AI Workbench is managed service for anyone to fire up notebook instances within minutes without excessive configurations and setups. Every Workbench instance is preinstalled with JupyterLab 3 and GPU-enabled ML frameworks such as PyTorch and JAX — This means you can create an instance and get on with the things you want to do without needing to set up and manage local servers — a major time-saver and a hassle-free experience!
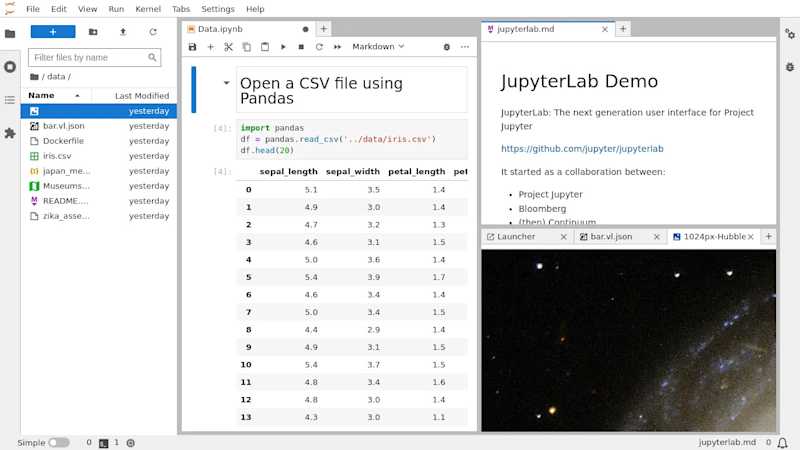
Jupyter Lab 3 interface, from https://jupyterlab.readthedocs.io/en/stable/getting_started/overview.html
And here comes the killer feature: The ability to sync with a GitHub repository. Workbench notebooks have baked-in support for collaborative development both publicly and privately. In case that your version control system is located in somewhere else, it also has decent supports with other authentication and authorization services on GCP.
Comparison with other notebook services
So far, it seems like Workbench is just another way to set up a cloud notebook server. Isn’t that free solutions like Colab and Kaggle notebooks already offer that?
Here are the points to consider whether to use Vertex AI Workbench or not, especially for serious projects:
Focus and Control:
Dedicated Environment: Unlike Colab’s temporary sessions and Kaggle’s shared resources, Vertex AI Workbench offers a persistent, dedicated environment for your projects. This means no more worrying about the instance timing out, and more control over your work!
Customization Options: While Colab and Kaggle notebooks offer limited customization, Vertex AI Workbench allows some degree of environment tailoring to install packages for specific project needs.
Scalability and Performance:
Resource Flexibility: Vertex AI Workbench lets you scale your notebook instances based on computational requirements. Need more processing power or memory for complex tasks? You can easily spin up instances with 64+ vCPUs and 258+ GB RAM to work together. Colab and Kaggle offer limited scalability options.
Dedicated GPUs: Vertex AI Workbench attachs dedicated GPUs to your notebook instances for faster training times, and no monthly or weekly quota is imposed.
There are other important factors such as the builtin support for collaborations and enterprise-grade security. But since this is aiming to be a quick guide to get you started, we will not be discussing about these in this blog post.
Setting your first notebook on Vertex AI Workbench
Preparing your GCP Account
Ready to explore the potential of Vertex AI for your data science projects? Since Vertex AI is a part of GCP, you will need to have a valid GCP project that is linked to a billing account. If you are already a paying customer, you can skip this section.
Here are the steps to get you started with GCP and enable the Vertex AI API:
Sign Up for GCP:
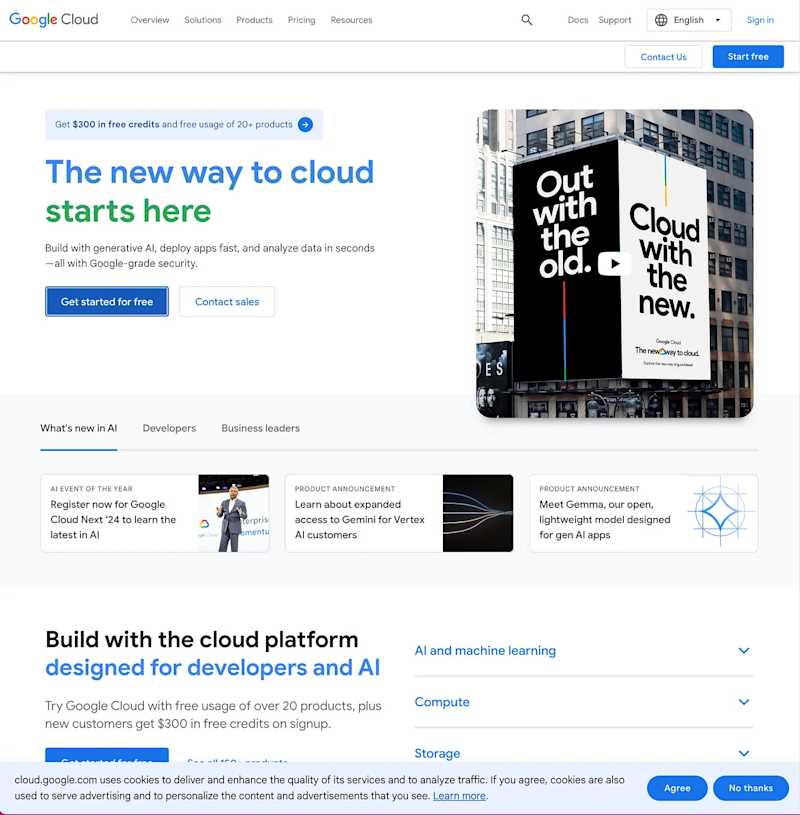
Sign up for GCP at https://cloud.google.com/
Head over to https://cloud.google.com/ and click on the “Get started for free” button.
Follow the on-screen prompts to create a new Google Cloud account or use your existing one.
You’ll be prompted to set up billing — GCP offers a generous $300 Free Trial credits for new users to use in their first year on GCP, so you can experiment with Vertex AI without initial charges.
In case that you want to explore the Search and Conversation functionality of Vertex AI, you can also apply for a one-time $1,000 credit per Google Cloud billing account to create search, chat, and other GenAI apps.
2. Enable the Vertex AI API:
Once logged into the GCP Console, you should be greeted by this screen:

GCP console landing screen
In the search bar, type “Vertex AI” and select “Vertex AI” from the search results:
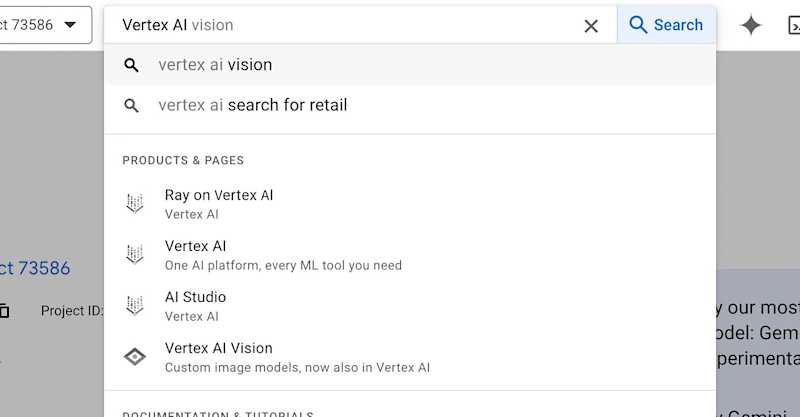
On the Vertex AI dashboard, you’ll see an option to “Enable All Recommended APIs.” Click on this button. This will activate the necessary APIs for using Vertex AI functionalities.

Congratulations! You’ve successfully signed up for GCP and enabled the Vertex AI API. Now you can explore Vertex AI Workbench, pre-installed with essential data science libraries, and start experimenting.
Creating an instance
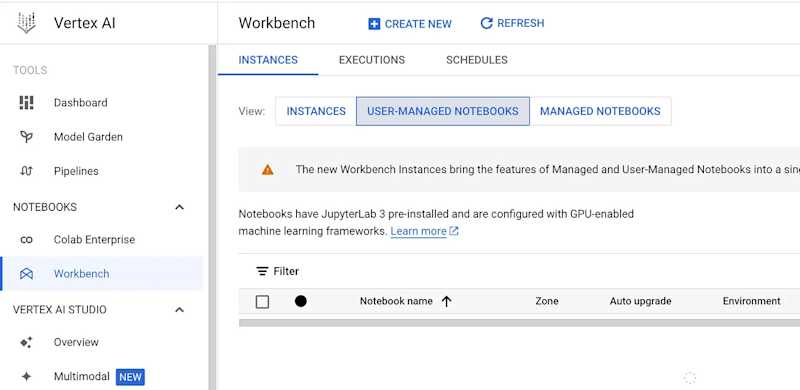
There are three types of instances: “Instances”, “User-managed notebooks”, and “Managed Notebooks”.
Once you entered the Vertex AI Workbench page, you will be seeing three types of instances:
Vertex AI Workbench instances: An option that combines the workflow-oriented integrations of a managed notebooks instance with the customizability of a user-managed notebooks instance.
Vertex AI Workbench managed notebooks (deprecated): Google-managed environments with integrations and features that help you set up and work in an end-to-end notebook-based production environment.
Vertex AI Workbench user-managed notebooks (deprecated): Deep Learning VM Images instances that are heavily customizable and are therefore ideal for users who need a lot of control over their environment.
Due to recent updates in Vertex AI Workbench, both managed notebooks and user-managed notebooks are deprecated earlier in January this year. They will still be there for while though, until the shutdown date at the end of January in 2025.
That being said, let’s choose Vertex AI Workbench instances for now.
Configuring the instance
Once you clicked the “Create an instance” button, you will be greeted by this screen:
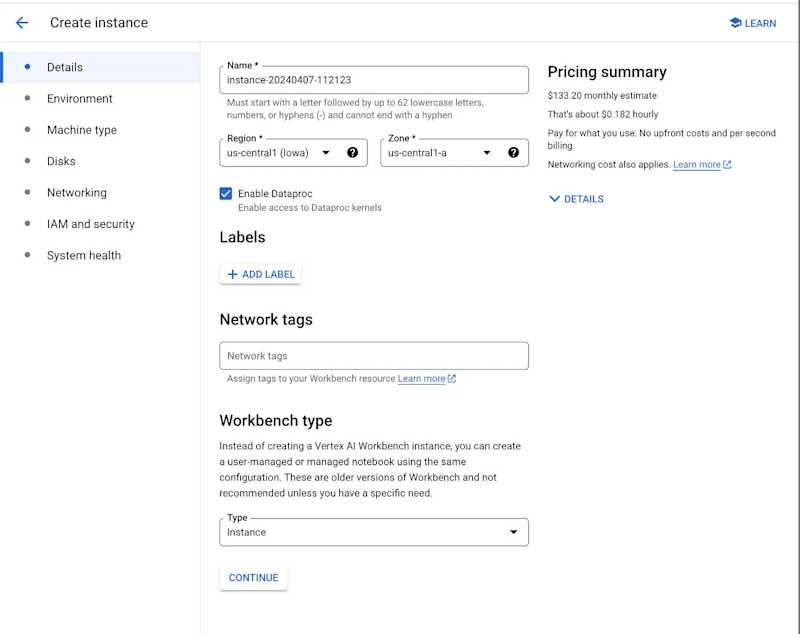
This will be the configurations we need to set up the instance. From this page, you can select where your instance is going to be located. Most of the time you should choose a location that is close to you so that the latency would be minimized. For a complete list of available regions on GCP, refer to https://cloud.google.com/compute/docs/regions-zones.
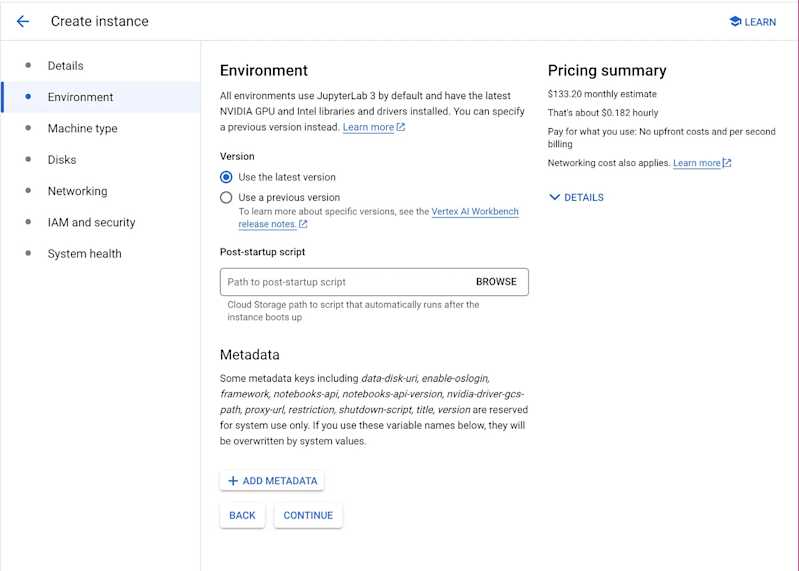
On the next screen, this will be configuring the initial environment of the instance. Since we do not have any specific requirements right now, we can leave it as is:
In the next page, we can choose the machine type of the instance, meaning that we can control how many resources are to be allocated to the instance:
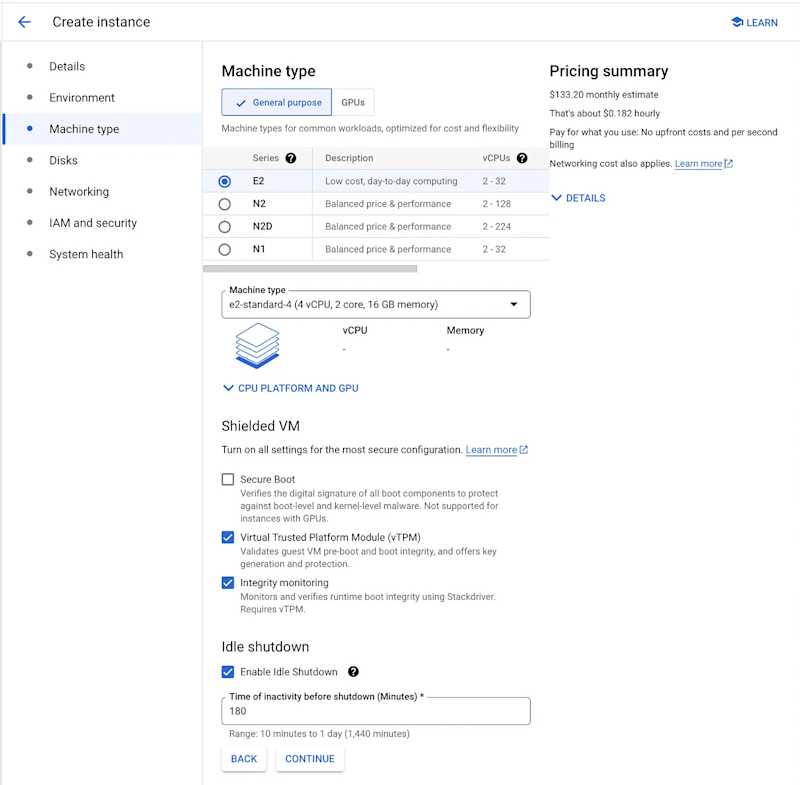
This is a very crucial part of the instance creation, as it can determine if your instance have adequate resources, or if your notebook server having a GPU attached or not.
For a complete list of machine types, please refer to https://cloud.google.com/compute/docs/machine-resource and https://cloud.google.com/compute/docs/general-purpose-machines.
In this case, we will just leave the default option (e2-standard) as our choice.
At this point, your instance should be pretty set to go. In case that you need to configure more on other resources such as disk spaces and network interfaces, you can continue to configure them in the following pages:
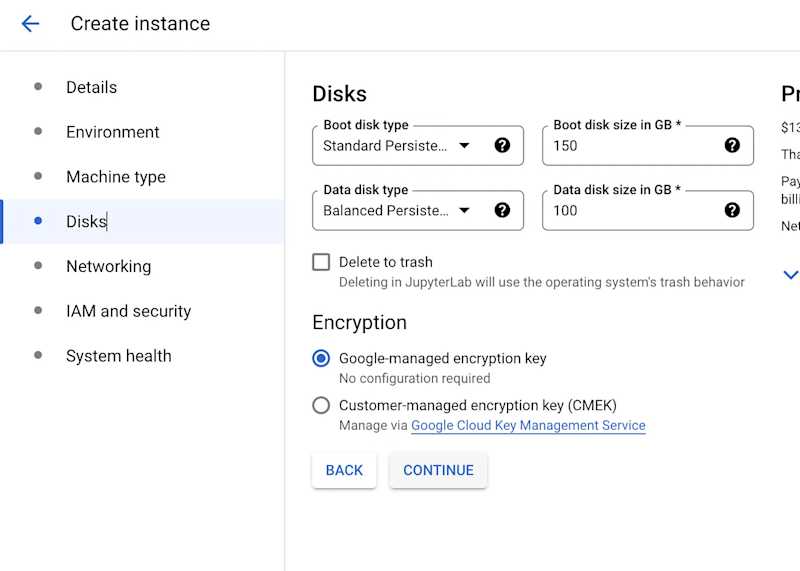
After confirming your choices, click the “Create” button at the bottom of the page to create the instance. GCP console page will guide you back to the list of instances:
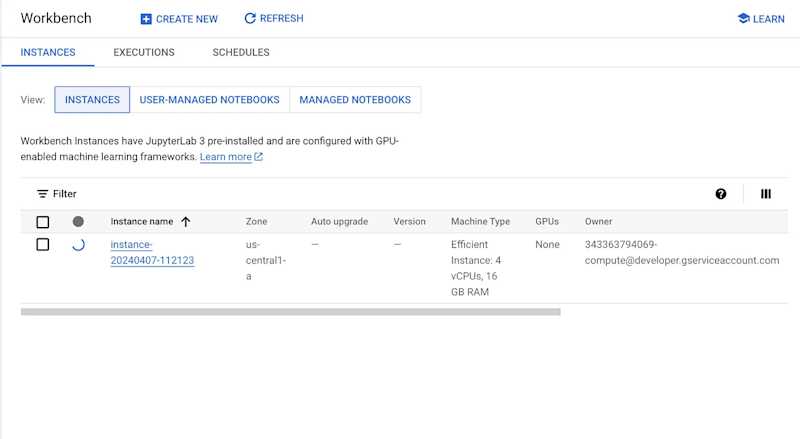
As you can see there is a spinning icon. This is telling you that GCP is working hard to allocate resources for your instance. Depending the configuration, this process can take as little as 2–5 minutes, or more.
Now might be a good time to grab a cup of tea.
Success!
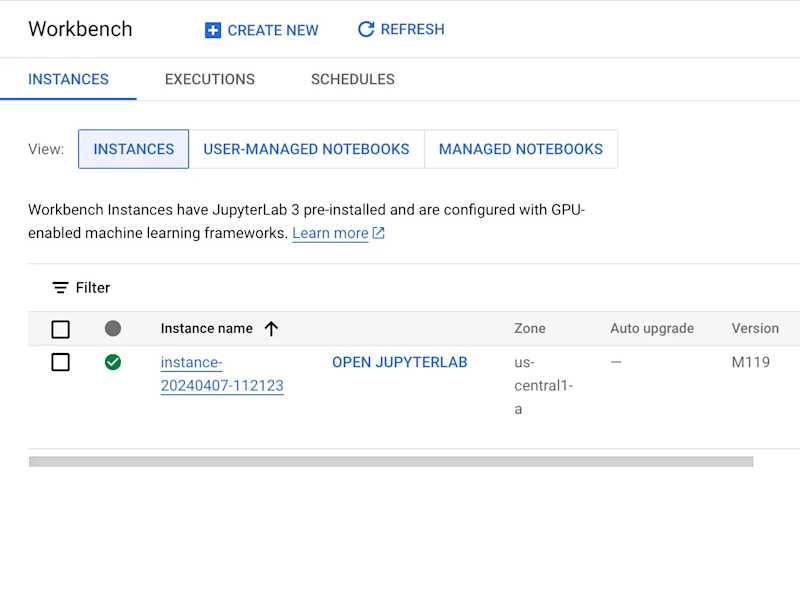
After a while, you will see the spinning logo becomes a green tick. This is the indication that the instance is ready to accept connection. Click the “Open Jupyterlab” button to connect to the instance!
Once you connected to the instance, you will see this screen — we can already see that PyTorch and Tensorflow are already preinstalled — pretty cool eh?

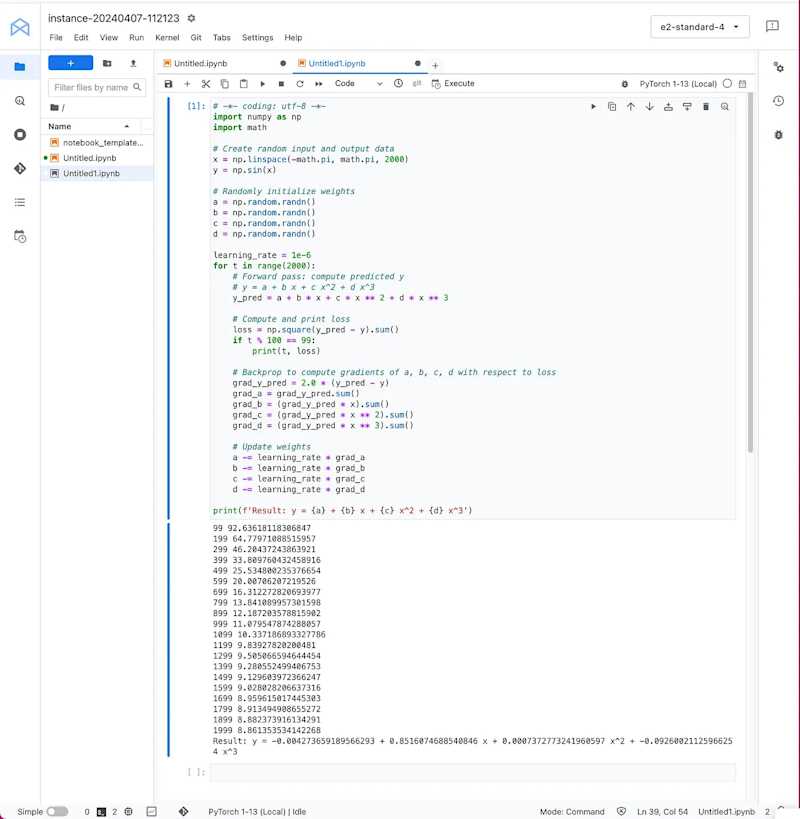
To test things out, we can open a PyTorch notebook, copy and paste the example codes provided by PyTorch (https://pytorch.org/tutorials/beginner/pytorch_with_examples.html):
And it works flawlessly:
Conclusion
Congratulations! You’ve successfully navigated the world of local Jupyter server frustrations and set up your very own Vertex AI Workbench instance. Now comes the exciting part: unleashing the potential of your data!
Remember, this is just the beginning. Vertex AI Workbench offers a robust, scalable, and collaborative environment brimming with possibilities. In the following blog posts, I will be introducing other Vertex AI services that will make your journey in developing ML applications a breeze. Stay tuned!